Oracle Cloud 折腾记录
PS:想问一下oracle cloud shell咋用??会用的请评论
PS:oracle cloud的官方文档写的不咋地,有些错误,请小心
PS:下述脚本已经github备份,如果wget链接失效可以评论
—正文开始—
注册Oracle Cloud就不赘述了,最好手机开4G注册。
第一步,开一台云服务器实例,平台映像我选的是CentOS7。
第二步,本机生成ssh公钥私钥(见之前文章),并上传公钥。引导卷大小不用变,但是合计超100G会收费,所以删服务器时一定要记得删去引导卷,数据传输是否选择加密看个人需求。
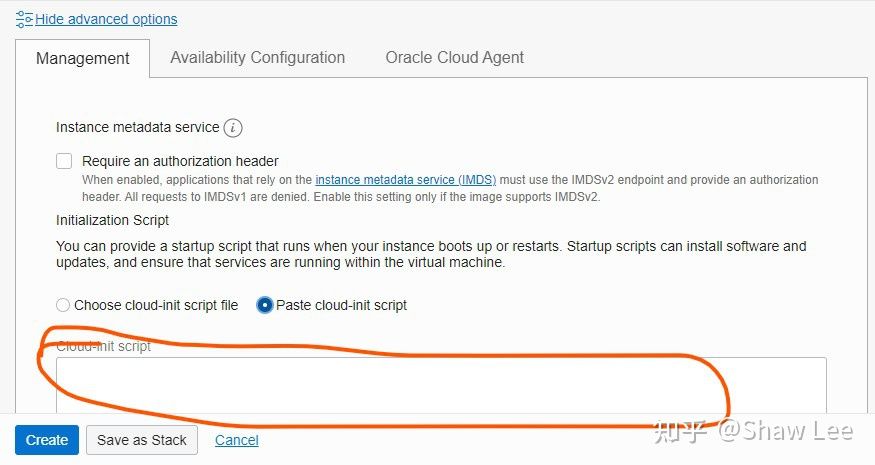
第三步,利用脚本开启root登陆。
Oracle 实例和G家一样,默认没有开启 ssh 密码登录功能,而且也没有提供网页 ssh,仅提供 ssh 密钥的方式建立连接,对于mac不太友好,在探索后发现可以在创建实例的时候利用 cloud-init 脚本就可以了。(此方法也适合 gcp,功能和原理都是一样的)
通用型:
1 | #!/bin/bash |
debian:
1 | #!/bin/bash |
centos:亲测CentOS7
1 | #!/bin/bash |
ubuntu:
1 | #!/bin/bash |
工作原理:
工作原理就是在新实例开机的时候自动执行该脚本修改sshd_config这个配置文件,从而达到我们的目的,其中123456789是我们需要修改的 root 密码,PermitRootLogin和PasswordAuthentication是ssh 密码登录的关键,并且必须是yes值才能正常 ssh 密码登录。
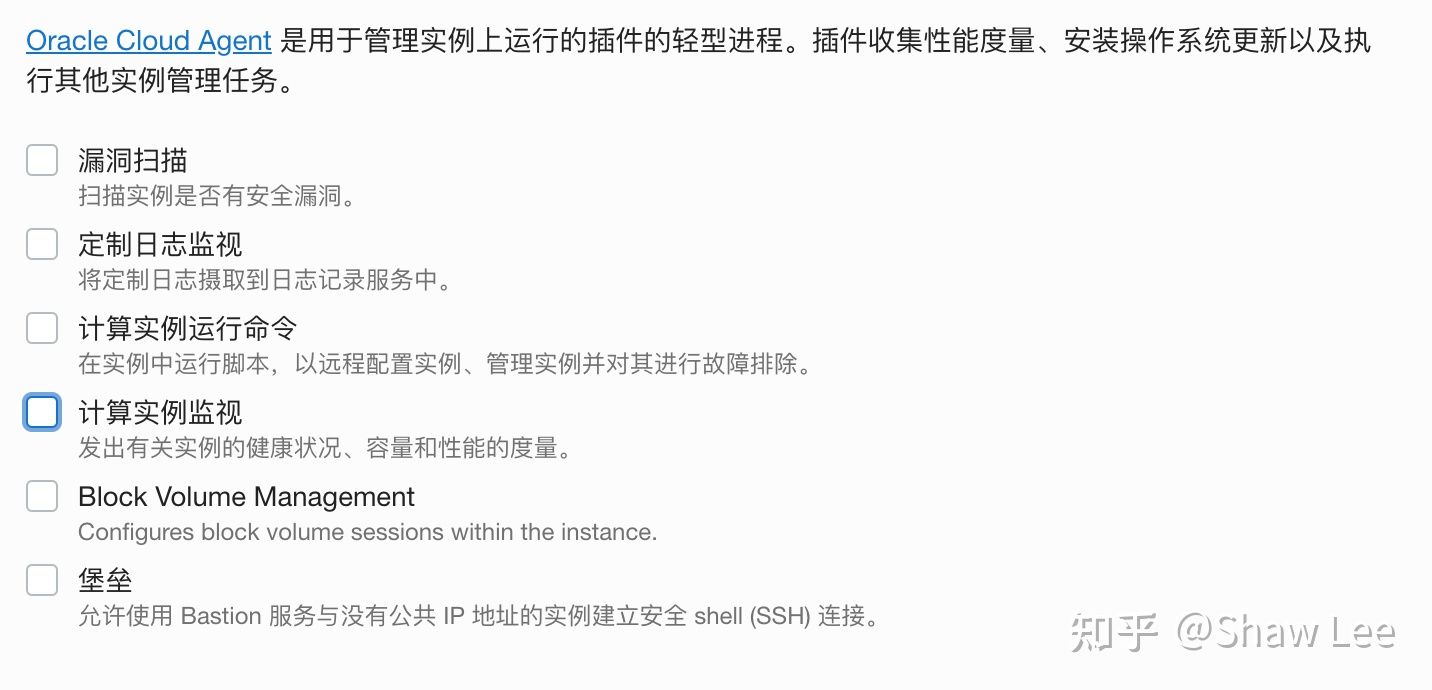
第四步:如对甲骨文心存疑虑,可去掉勾选cloud-agent的打勾选项,这里选着后面也可以卸掉。
第五步:root登陆
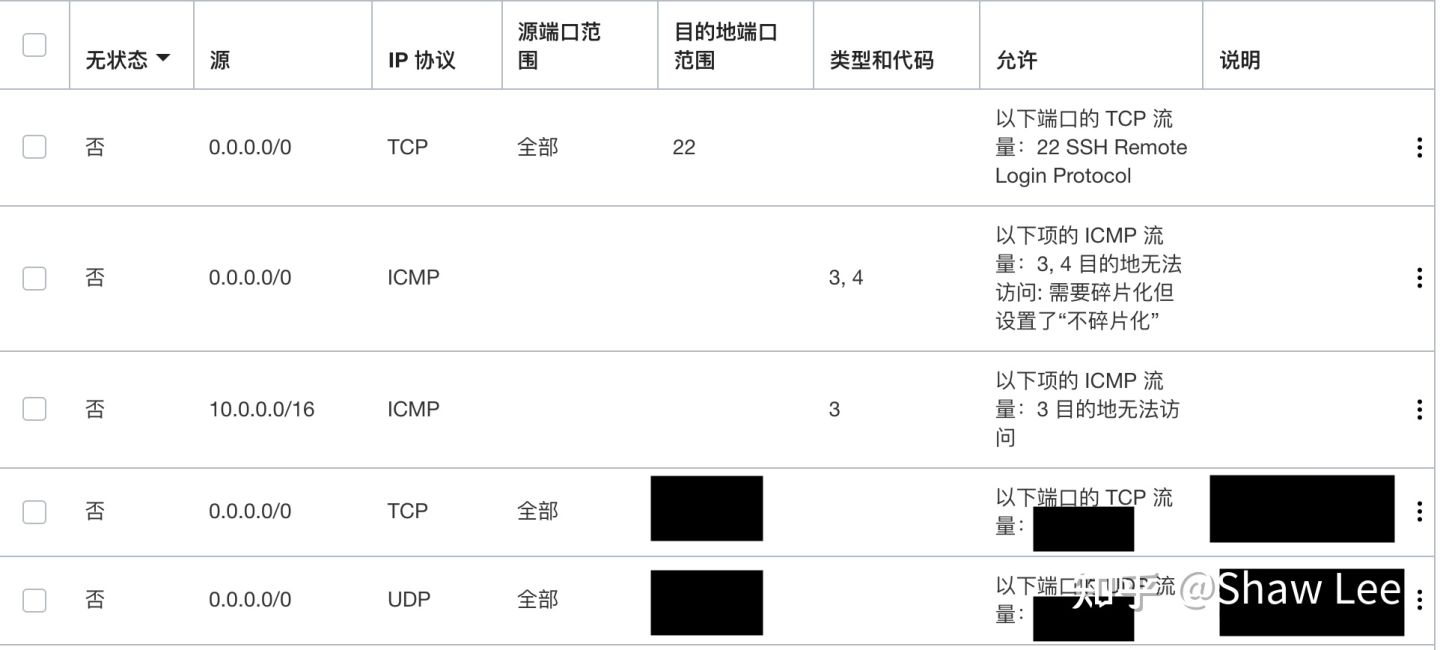
ping一下IP地址,如果ping不通,大概率是防火墙规则问题,如下修改开启全部ICMP流量,ping通后,此条规则可删去

如果上述操作后仍不能ping通,按下述路径去换ip地址

开始连接,在终端
1 | 1、ssh root@ip地址 |
或者采用FinalShell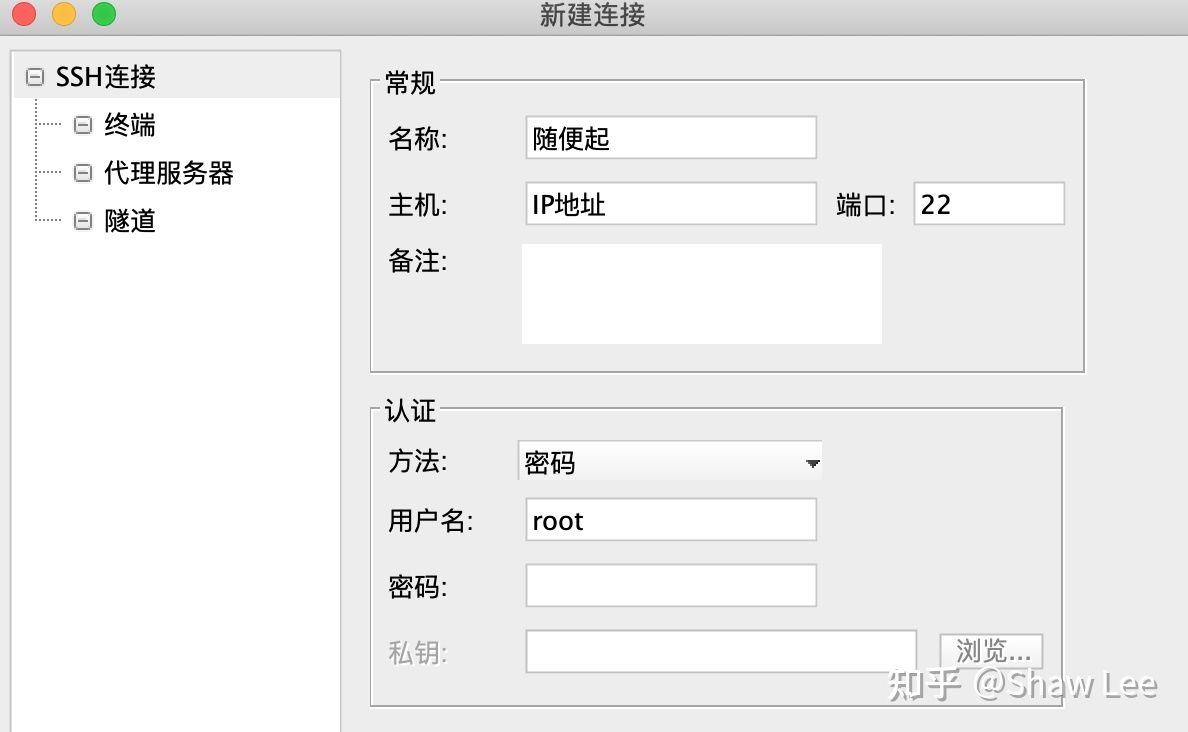
第六步:卸载相关程序
pcbind
使用netstat -ntlp命令发现rpcbind监听了111端口,如担心安全可执行以下命令卸载禁用:
1 | systemctl stop rpcbind |
oracle-cloud-agent
卸载甲骨文云官方后台监控程序
1 | systemctl stop oracle-cloud-agent |
第七步:Oracle Cloud VPS CentOS 7 升级内核并开启官方原版Bottleneck Bandwidth and RTT
转自https://www.ioiox.com/archives/63.html
更新 yum,时间较长
1 | yum -y update |
查看内核
1 | uname -r |
手动下载秋水 Bottleneck Bandwidth and RTTPlus版内核
1 | wget https://raw.githubusercontent.com/chiakge/Linux-NetSpeed/master/bbrplus/centos/7/kernel-4.14.129-bbrplus.rpm |
手动安装内核
1 | yum -y install kernel-4.14.129-bbrplus.rpm |
更新引导
1 | grub2-mkconfig -o /boot/grub2/grub.cfg |
列出系统开机启动项
1 | sudo awk -F\' '$1=="menuentry " {print i++ " : " $2}' /boot/efi/EFI/centos/grub.cfg |
设置新版内核默认启动项
1 | grub2-set-default 0 |
重启
1 | reboot |
上述步骤已经完成安装,下面开启 Bottleneck Bandwidth and RTT Plus 及优化
运行下述一键脚本,选择7开启加速.
再次运行下述一键脚本,选择10优化并重启完成.
1 | wget -N --no-check-certificate "https://raw.githubusercontent.com/chiakge/Linux-NetSpeed/master/tcp.sh" && chmod +x tcp.sh && ./tcp.sh |
检测 Bottleneck Bandwidth and RTT Plus 是否开启成功,输入
1 | sysctl net.ipv4.tcp_available_congestion_control |
如果返回值为:
1 | net.ipv4.tcp_available_congestion_control = bbrplus cubic reno |
则开启成功
第八步:建站等等操作,按照个人需求进行(你懂的)
第九步:防火墙规则
个人不推荐所有协议和所有端口全部打开,如果没有建站需求的话,http的80和https的443也无需打开。
由于目前本人需求只需要打开一个端口,所以我只开一个端口和ssh的22端口,其他2个官方自带规则没有动,对于我的需求来说,已经够用了。